Tuesday, December 25, 2012

12-25-2012 7_41_23 PM

Today on Christmas, I setup a new bench and part of my greenhouse irrigation system. The one on the left, the new one, will hold seedlings requiring misting and the one on the right will be for my potted plants.  I'm so happy about having this system...this summer many of my plants met their demise by scorching and the thought of giving up gardening because I'm so busy, brings sadness to my heart.  


I blog with BE Write

12-25-2012 7_41_23 PM

Today on Christmas Day, I setup a new bench and part of my greenhouse irrigation system. The one on the left will hold seedlings requiring misting and the one on the right will be for my potted plants.  I'm so happy about having this system. This summer many of my plants met their demise by scorching. 


I blog with BE Write

Wednesday, April 11, 2012

spring

 I was really bummed out that I would have to wait till fall to start enjoying my newly found hyacinth vases. And so when I found some at my local garden store, I had new found hope.  And so I came home and took it out of its pot and placed it in the vase. A couple of weeks went by and I noticed the roots getting translucent and no sign of growth from the bulb itself...and it started to stink.  The bulb rotted.  I learned a lesson.
My daughter painted this birdhouse and so it has a new home in the garden.  I don't think any birds will be taking residence in it...and it they do, it won't be till winter.

My thriftstore find...painted and braced to the house. Stock flowers are living there now.

I started this rhubarb plant from seed last spring but it didn't have much of a life then because I planted it and forgot to connect it to the irrigation system.  I thought it was gone for good....and to my pleasant surprise, I discovered it  growing this spring.  Welcome! 

My seedless concord grape is growing in the greenhouse and as you can see, I need to trim all the dead leaves.

These are red-winged blackbirds and they are watching me as I stand near the kitchen window.  As soon as I walk away they fly to the birdfeeder on my window.

My Amaryllis bloomed for the second time.  The blooms were prettier the second time around.

Stock flowers in my windowbox.

Comfrey

Daffodils


Wednesday, March 7, 2012

Birdbath, Grape Hyacinth, and more

These fall planting bulbs were in the clearance section of my local garden center.


Muscari  Armenideum also known as Grape Hyacinth, were placed  in a bowl  filled with bark, water, and topped with moss. Once they are done flowering they will be planted out in the garden where they will multiply. Be forewarned, these can spread like weeds...they produce seeds and form bulblets.


It didn't take long for them to start growing.


The anise hyssop is growing in the garden. They give off a wonderful aroma when you rub the leaves between your fingers.  I can't wait to make some tea.

Here is my little ville de lyon clematis.


I checked out a book at the library called
 Concrete Garden Projects: Easy and Inexpensive Containers, Furniture, Water Features and More
by Malin Nilsson and Camilla Arvidsson


The book has some really attractive looking projects and most of them look simple enough.  So here is my endeavor at creating a heart birdbath.


I purchased a sheet of styrofoam from my local hardware store along with a bag of cement.  The project cost me less than ten dollars and I have enough supplies to make more.


I drew my heart shape and carved it out.
If I could do it again, I would carve the sides at an angle.  The edges came out rather square.


I placed a piece of plywood on the bottom and oiled the bottom and sides with oil to keep the concrete from sticking to the foam and board.


I mixed and poured the concrete.  I must say that I had  trouble with this step, never having worked with cement before,  the cement mix was fine and it also contained small rocks.  I wasn't sure whether to leave out the small rocks and use the fine dust or if a mix of both was necessary? So I had lots of texture, but it could have been from too much water. Not sure.


I covered the project with plastic to keep it from drying too quickly.

...and voila! It's beautiful, functional and enjoys daily visits from our local birds.  Next I will make some hypertufa pots.


A cute little bird visiting my kitchen window feeder. Unfortunately the birds see us and if we get too close to the window they fly away.

Thank you for stopping by.
Daisy


Thursday, March 1, 2012

There is a great film on gardening and one mans adventure at trying to solve his low water issues and how he did it.  Thank you to Liisa  at Liisa's Garden Journey for sharing it.  Hope you enjoy. By the way, The name of the film is Back to Eden.

The above link won't be able to connect you to the film, it will connect you to Liisa's blog, one of my favorite bloggers.
  Here is the back to eden link:   http://backtoedenfilm.com/

Update

We finally got some snow.   It was beautiful but short lived.
 My "Elvas" amaryllis didn't turn out to be an Elvas after all. It looks like Candy Cane. Not sure.


Looks like I'll be getting another bloom.

I bought this clematis root from my nearby boxstore.  It is very small and from what I've read you are better off buying a small clematis plant vs these roots.  You'll want to keep the vines trimmed down to 18"- 24" the first year so that it can put it's energy into developing a strong root system.
The single stem clematis no longer looks like this.  I forgot to cover it and it wilted because it was not hardened, so I cut it down to the base and it already has growth on both sides of the base.  I'll share a pic next time.
One echinacea seedling came up...woohoo! The seeds weren't very viable or this one is a very early bloomer.
Here are my wintersown flax seedlings.
Blend of dill, purple cabbage, onions.
Lupine
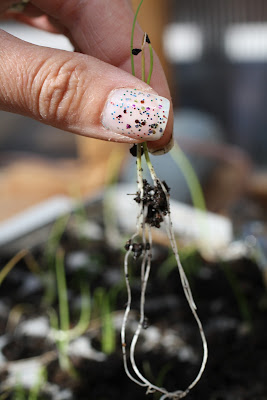
I transplanted the spanish onion and leeks and I think I waited too long to do this because they seem a little small.
I'm giving my leeks some compost tea which I made from a blend of comfrey, alfalfa, compost, and molasses.  Oh and it smells rather foul in my greenhouse thanks to this lovely liquid fertilizer but it does increase the humidity level which I find to be another great benefit.
I brought one of my indoor plants outside for some sunshine and tea.
Transplanting the onion seedlings.  The pic is out of order but I'm too tired to fix it.
My Sweet Pea.  I've started pinching back the ends to make them bush out.
The bok choy in the greenhouse bolted along with the mizuna and tatsoi.  One thing I did learn about gardening in the greenhouse this winter is not to grow kale for winter use.  The leaves grow so diminished in size(from less sun) that it is not even worth a meal, and from the looks of them, they will be bolting soon. I am going to stick with lettuce, bok choy, mache( which quickly became a household favorite) and mizune.

Only one guara seedling has come up. I must say that I did have great luck with snow-in-the-summer, poppies, and chinese lanterns(these gow like weeds actually).
The bag contains dehydrated celery from last years garden and  I found that rehydrating them and using them in soups does not produce good texture. It feels as if you are chewing sugarcane without the sweetness...anyways, so I ground them up, and placed them in a spice jar. It looks pretty and it make my dishes have a wonderful celery flavor.

Till next time and thank you for stopping by.